 Call Us: 214-585-0050
  Find A Location
  sales@graphicInstallationteam.com
Every business wants their graphics to make a lasting impression. Whether it’s a fleet of delivery vehicles wrapped with your logo, a retail storefront boasting new window graphics, or a bold trade show display, professional installation is key. But even small mistakes during installation can cost businesses thousands of dollars, create a poor impression, and shorten the life of your graphics.
In this article, we’ll talk about the most common mistakes businesses make during graphic installation, why they happen, and how to avoid them. Along the way, we’ll highlight the difference between graphic installers and certified professionals, show examples from real U.S. projects, and provide actionable tips for achieving high-quality results that last.
Choosing the Wrong Graphic Installer
One of the earliest mistakes businesses make is hiring the wrong installer. Not all graphic installers are created equal. Some local shops may be convenient and budget-friendly but lack formal training or certification. On the other hand, certified installers such as 3M Certified Installers have verified skills and experience with high-quality materials.
Why it matters:
- Poor installation can result in bubbles, wrinkles, fading, or peeling graphics.
- Non-certified installers may not follow manufacturer guidelines, potentially voiding warranties.
- Experience with local conditions matters; installers familiar with U.S. climates know how heat, humidity, and sun exposure can affect adhesion.
How to avoid this mistake:
- Verify certifications like 3M or Avery Dennison.
- Request a portfolio of past work, including vehicles, retail signage, and event graphics.
- Ask for references from other local businesses.
Hiring the right installer upfront saves time, money, and headaches down the line.
Poor Planning and Preparation
Many graphic installation issues stem from inadequate planning. Businesses sometimes order graphics without clear measurements, layout plans, or mockups. Others skip evaluating surfaces or fail to anticipate environmental factors.
Common problems:
- Misaligned graphics on walls, windows, or vehicles.
- Air bubbles and wrinkles due to uneven surfaces or poor preparation.
- Adhesion problems caused by dirt, dust, or moisture.
Best practices for preparation:
- Conduct a site survey or vehicle assessment.
- Take precise measurements and create a mockup for visual reference.
- Inspect surfaces for cleanliness, smoothness, and structural integrity.
- Consider environmental conditions—installing outdoors on a hot day in Arizona or a humid day in Florida requires different handling than indoor installations.
Proper planning helps prevent errors that can ruin even high-quality graphics.
Using Low-Quality Materials
Not all graphics materials are equal. Some local shops may use cheaper vinyl or adhesives to cut costs, but low-quality materials fade faster, peel sooner, or fail under normal wear and tear.
Why material quality matters:
- Premium films from 3M or Avery Dennison are engineered for durability, color retention, and weather resistance.
- Cheaper films can bubble, curl, or fade quickly, especially on vehicles exposed to sun, snow, and road debris.
- Warranties often require certified materials and professional installation.
Tip for businesses: Always confirm that your installer is using high-quality materials suitable for your project type and local climate. For example, coastal areas may require UV-resistant films, while northern states with winter salt roads need durable adhesives.
Ignoring Surface and Environmental Conditions
A smooth wall or a vehicle isn’t always ready for a graphic. Surfaces can be textured, painted, dirty, or uneven, and environmental factors like sun, rain, and humidity can interfere with adhesion.
Common mistakes:
- Installing graphics directly on dirty or oily surfaces.
- Applying graphics on walls with rough textures without proper prep.
- Ignoring temperature requirements for vinyl and adhesive application.
How to avoid problems:
- Clean and prep all surfaces before installation.
- Avoid extreme temperatures; most films require 50–90°F for optimal adhesion.
- Use proper primers or underlays for textured or challenging surfaces.
Certified installers are trained to recognize these challenges and adjust techniques accordingly, reducing the risk of failure.
Incorrect Graphic Installation Techniques
Even with quality materials and clean surfaces, improper installation can ruin graphics. Mistakes like bubbles, wrinkles, misaligned edges, or uneven stretching are common among inexperienced installers.
Issues to watch for:
- Vehicle wraps with air bubbles along curves or seams.
- Window graphics that peel at the edges due to insufficient heat or pressure.
- Wall murals that misalign, especially in large-format projects.
How certified installers prevent mistakes:
- Using precise squeegee techniques and heat guns for adhesion.
- Following manufacturer guidelines for stretching and finishing.
- Performing quality checks during and after installation.
Overlooking Post-Installation Graphic Care
Graphic installation doesn’t end when the last squeegee is applied. Many businesses fail to educate employees or clients on proper maintenance, which can dramatically shorten the lifespan of graphics.
Common mistakes:
- Cleaning with harsh chemicals that degrade adhesive.
- Neglecting regular inspection for small bubbles or lifting edges.
- Exposing outdoor graphics to unnecessary wear, like high-pressure washing.
Maintenance tips:
- Use mild soap and soft cloths for cleaning vehicles and storefronts.
- Inspect graphics monthly for early signs of wear.
- Schedule touch-ups or repairs with certified installers if needed.
Proper care extends the life of your investment and ensures graphics look sharp over time.
Mismanaging Project Timelines
Rushing installation often leads to errors. Businesses sometimes schedule installations without accounting for weather, business hours, or other local factors.
Common pitfalls:
- Installing during peak sun or extreme cold.
- Overlapping installations for multiple vehicles or locations without enough staff.
- Missing deadlines for events, launches, or promotions.
How to manage timelines effectively:
- Plan around seasonal and local weather conditions.
- Allow buffer time for corrections or adjustments.
- Coordinate closely with installers to ensure realistic schedules.
Failing in Branding and Design
A poorly thought-out graphic can hurt brand perception. Even if installation is technically flawless, poor design or placement can reduce visibility and impact.
Examples of mistakes:
- Colors that don’t match brand standards.
- Graphics placed where they are blocked from view or difficult to read.
- Fonts or messaging that don’t resonate with local audiences.
Tips:
- Review designs with your installer before production.
- Consider local demographics and cultural nuances in your region.
- Test mockups for readability and visibility.
Ignoring Local Graphic Codes and Regulations
Signage and graphic installation often require compliance with local building codes, zoning laws, or permit requirements. Skipping this step can lead to fines, forced removal, or delays.
Tips for compliance:
- Check with your city or county building department.
- Work with local certified installers familiar with regional rules.
- Keep documentation of permits and approvals.
Overcomplicating or Oversizing Projects
Large or complex installations increase the risk of mistakes. Businesses sometimes order oversized graphics without considering installation challenges.
Common issues:
- Misaligned seams on large vehicle wraps.
- Difficulty handling large wall or window graphics.
- Increased installation time leading to rushed work.
Solutions:
- Break large projects into manageable sections.
- Work with experienced installers to plan logistics.
- Test on smaller sections before full application.
Communication Breakdowns in Installation
Clear communication between business owners, designers, and installers is crucial. Misunderstandings about project scope, timing, or materials often lead to errors.
Tips to improve communication:
- Establish written project plans with clear deadlines.
- Use photos or mockups to clarify expectations.
- Schedule regular check-ins during installation.
Cost-Cutting Mistakes
Trying to save money by choosing the cheapest option often backfires. Low-cost installers or materials can result in:
- Early peeling, fading, or lifting graphics.
- Higher long-term replacement costs.
- Damaged brand reputation due to poor presentation.
Better approach: Consider long-term value. Premium materials and certified installers may cost more upfront but save money and protect your brand over time.
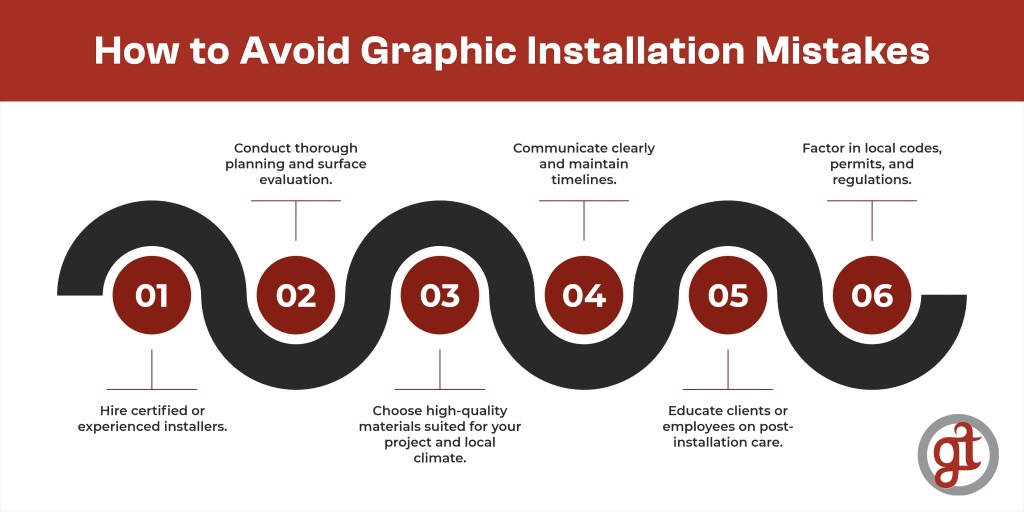
How to Avoid Graphic Installation Mistakes
- Hire certified or experienced installers.
- Conduct thorough planning and surface evaluation.
- Choose high-quality materials suited for your project and local climate.
- Communicate clearly and maintain timelines.
- Educate clients or employees on post-installation care.
- Factor in local codes, permits, and regulations.
Following these steps ensures your graphics look professional, last longer, and provide the return on investment your business expects.
Graphic installation is about more than just sticking vinyl on a surface. Mistakes can be costly, but with the right planning, materials, and certified professionals, businesses across the U.S. can achieve high-quality results. Companies like Graphic Installation Team offer certified services for vehicle graphics, retail displays, and event graphics, helping businesses avoid common pitfalls while delivering polished, long-lasting visuals.
📍 Expert Graphic Installers Across the U.S.
🌐 GraphicInstallationTeam.com
Invest in quality today, and see flawless results tomorrow.
