 Call Us: 214-585-0050
  Find A Location
  sales@graphicInstallationteam.com
Barricade and construction wraps are large-format printed graphics applied to temporary fencing, plywood hoarding, or panel systems surrounding a construction or renovation site. The outcome you get depends far more on the survey and the substrate than on the artwork. A wrap on smooth ACM panel behaves nothing like the same design on a rough plywood barricade or a chain-link mesh scrim.
Before anything prints, someone should measure the real site, decide how the panels break, and match the material to how long the barrier will stand and what weather it faces. Working with experienced Graphic Installation Services McKinney TX can help ensure these details are handled correctly from the start. Get those three decisions right, and the wrap looks sharp on day one and still looks intact months later.
What You’ll Walk Away Knowing
Most people come to this topic with a rendering in hand and a deadline, and they treat the wrap as a printing job. It is really an install job with a print attached. Below we walk through the substrates you will actually be choosing between, why a real site survey changes the whole plan, how large designs get split into panels and seams without a visible mess, what outdoor exposure does to a wrap over a six-month build, and where US permits quietly enter the picture. By the end, you will know what to ask for, what to expect on install day, and which decisions to lock down early so nothing gets re-measured or reprinted at the worst moment.
Barricade Wrap Versus Construction Hoarding: They Are Not the Same Job
People use “barricade” and “hoarding” interchangeably, and the graphics look similar from the sidewalk, but the two structures behave differently, and that changes the install.
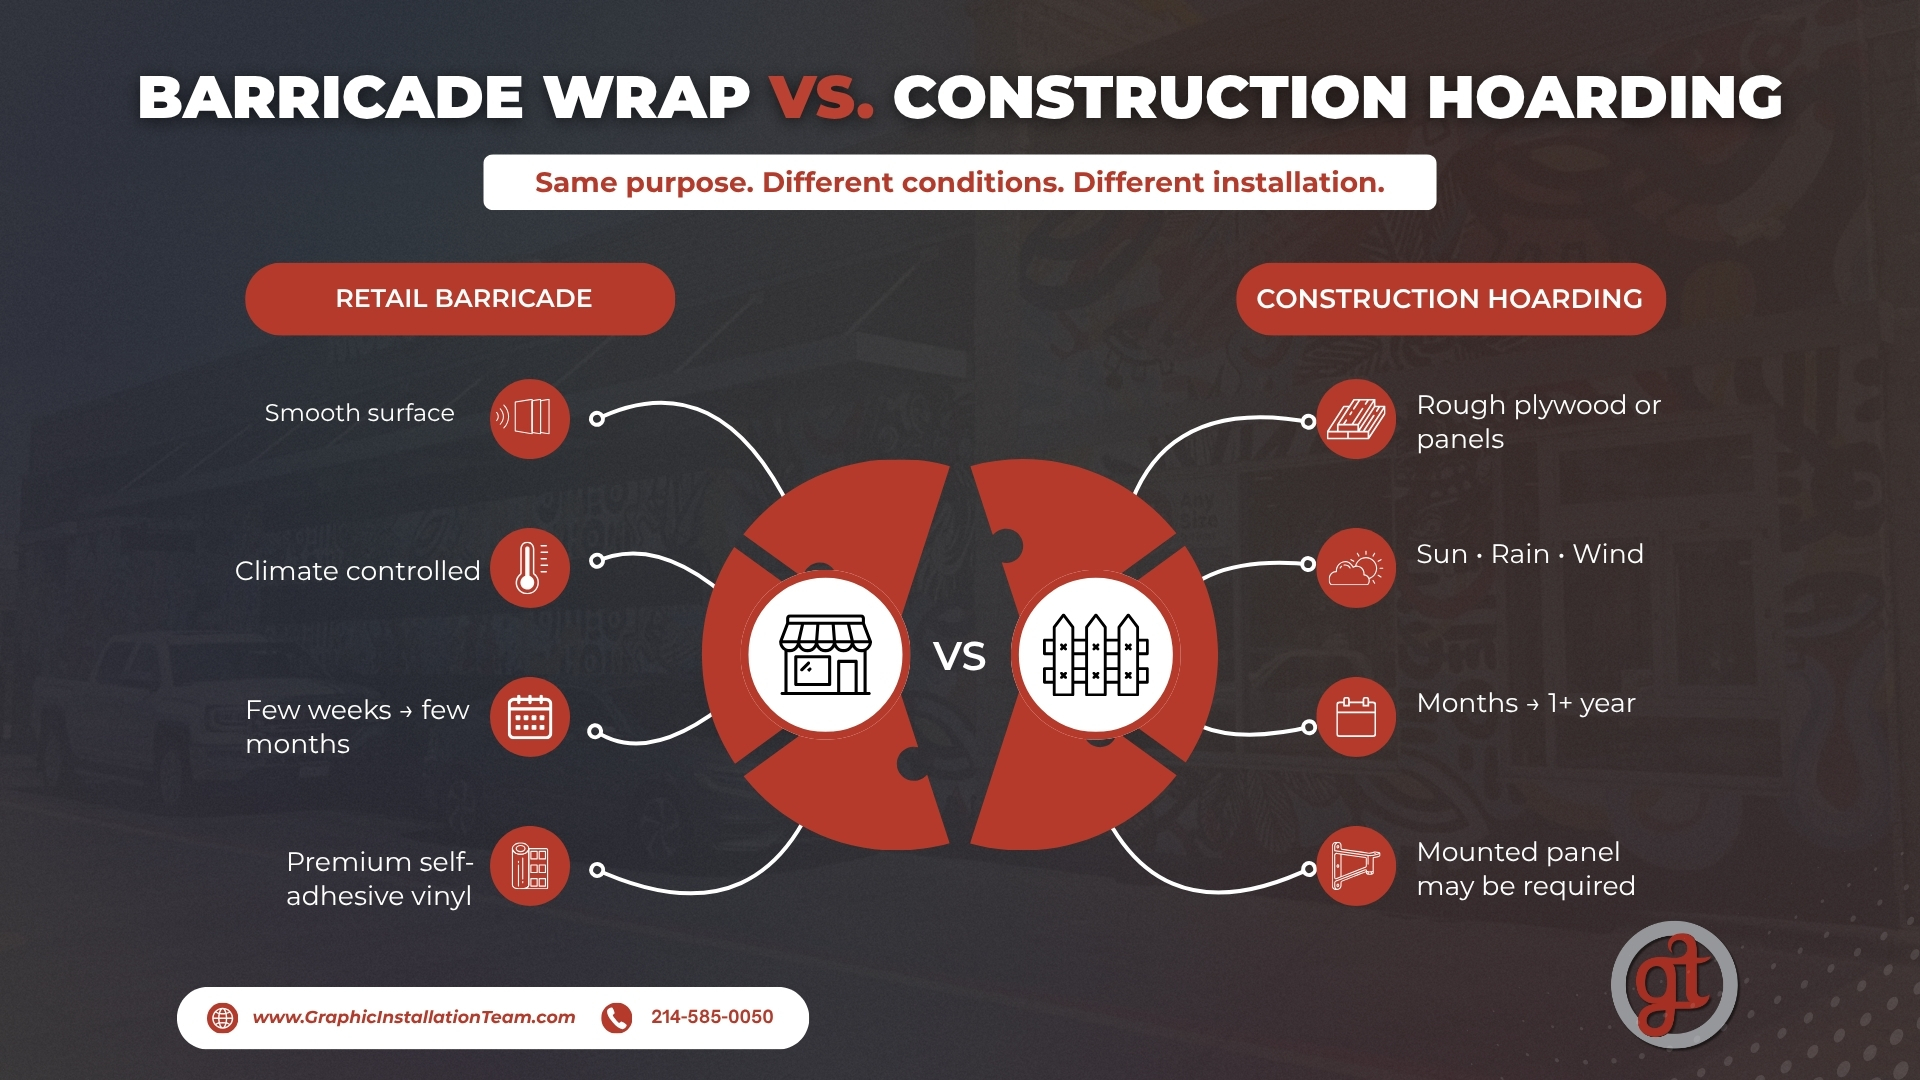
A retail barricade is usually a short-run, interior or covered barrier around a store buildout inside a mall or a finished building. It is often smooth, clean, temperature-controlled, and up for a few weeks to a few months. Construction hoarding is the exterior version: taller plywood or panel fencing around a ground-up build or a facade renovation, exposed to sun, rain, and wind, sometimes for the better part of a year.
That distinction drives every downstream choice. A mall barricade can take a premium self-adhesive vinyl on a smooth face and look flawless. An outdoor hoarding on rough exterior-grade plywood needs a different material and often a mounted panel rather than a direct-to-surface decal. When you brief a job, say which one you actually have. It is the first thing we ask.
Choosing the Right Substrate for Barricade Wrap Installation
The substrate is the single biggest driver of how a wrap looks and how long it holds. For barricade wrap installation, you are usually deciding among a handful of real-world surfaces, each with trade-offs.
| Substrate | Best for | Holds up outdoors | Watch out for |
| Self-adhesive vinyl on smooth panel | Interior/mall barricades, short runs | Moderate | Needs a clean, smooth face or edges lift |
| ACM (aluminum composite, DIBOND-style) | Premium exterior hoarding | Strong | Higher cost, heavier panels, seam planning matters |
| Direct print to Coroplast | Budget, short-term outdoor | Fair | Flutes show through in raking light, less premium look |
| Mesh/scrim banner | Windy sites, tall fencing | Good with wind slits | Print resolution softer than rigid panel |
| Vinyl on exterior-grade plywood | Standard construction hoarding | Depends on prep | Rough grain telegraphs through; prime or skin first |
The honest version most vendors skip: vinyl applied straight onto raw, textured plywood will show the grain and can start lifting at the edges once the wood moves with humidity. If the barrier is plywood and it is outside for months, the durable path is either a smooth skin over the plywood first or a rigid ACM panel face. It costs more up front, and it is the difference between a wrap that still looks good at month five and one that is peeling by month two.
Why the Site Survey Changes Everything
Here is the part that separates a clean install from a scramble. The blueprint is not the site. On construction and renovation jobs, the barrier that actually gets built rarely matches the drawing to the inch. Doors get added for site access, a section gets notched around a standpipe, a run gets shortened because of a sidewalk shed.
A site survey means someone physically measures the barrier that exists, notes every door, corner, obstruction, and grade change, and photographs the surface condition. That survey feeds three things at once: the exact print dimensions, the panel and seam layout, and the equipment we bring. Skipping it is how you end up with a graphic that is four inches short at one end, a door cut straight through a face, or a crew standing at a 12-foot section with an 8-foot ladder.
This ties directly to how we handle larger environmental graphics. The same survey discipline behind our super graphics work, where a single image spans a whole facade, is what keeps a long barricade run aligned panel to panel. If you want the detail on that step, our site survey for graphics installation in Anna, TX process is built to catch exactly these gaps before anything prints.
What a good survey actually records
- Real measured length and height of every run, not the plan dimension
- Location and size of access doors, gates, and cut-outs
- Surface type and condition (smooth, rough, painted, dusty, uneven)
- Corners, returns, and where the graphic wraps or stops
- Grade changes and anything that blocks a clean panel line
- Access for lifts or scaffold, and overhead or foot-traffic constraints
Large-Format Seam Planning Without the Visible Mess
Barricade runs are long. Print material and panels come in fixed widths. So a 60-foot graphic is never one piece, and where the seams fall is a design decision, not an afterthought.
Good seam planning does two things. It places the vertical breaks where they disturb the artwork least, away from a face, a logo, or a critical line, and it sequences the panels so registration holds across the whole run. On a rigid panel job, the seam is a physical gap between boards, so the artwork has to be split with that gap accounted for or the image jumps. On a direct vinyl job, overlaps have to be planned so no seam opens up or catches a lifting edge.
The practical rule we follow: hide seams in the quiet parts of the design and never let one land through a face or a word. When a designer sends art with a logo dead center on a panel break, we flag it before print, because you cannot fix that with a squeegee on install day. This is also where construction wrap installation earns its keep as a specialty rather than a print-and-stick task: the sequencing, the registration, and the seam discipline are what make a long run read as one continuous image instead of a row of posters.
Outdoor Durability: What Six Months of Exposure Actually Does
A construction wrap is outdoor signage that has to survive a build cycle. Sun, heat, wind, and moisture all work against it, and the failure modes are predictable.
Sun fades ink and, more importantly, degrades adhesive over time. Heat is the quiet one. On a south-facing barrier in a Texas summer, the surface temperature of a dark wrap can run far above the air temperature, and that heat cycle every day is what loosens edges and lifts corners first. Wind lifts any edge that is not fully sealed, and a mesh wrap without proper wind slits can act like a sail and stress the whole fence. Moisture gets behind the graphic wherever the substrate was not sealed, especially on plywood.
Honest expectation setting: a properly installed exterior barricade wrap on the right substrate holds up well for a typical build cycle, often in the range of several months to a year or more, depending on the material, the sun exposure, and the site. A budget direct-print on Coroplast in full sun is at the short end of that range. An ACM-faced hoarding is at the long end. Nobody should promise a specific lifespan without knowing the substrate and the orientation, and any vendor who does is guessing.
The Practitioner Detail: Installer-Only Coordination on a Live Site
Here is something you only pick up by doing this work on real job sites, and it is specific to how we operate as an installer-only company out of Anna, Texas, serving DFW and nationwide.
We do not print, so we are not defending a print file. That sounds like a limitation, and it is actually the client’s advantage. Because we come in purely as installers, we survey the barrier honestly and tell the print vendor exactly what will and will not work before ink hits substrate. On more than a few DFW jobs, we have caught art sized to the blueprint instead of the built barrier, or a substrate spec that would have failed in the summer heat, and we sent it back to the printer to fix while it was still cheap to fix. A print-and-install shop has an incentive to run the file it already made. We have no file to protect, so our only job is making the install succeed.
The second piece is live-site coordination. A construction barricade is up while trades are working. The general contractor controls site access, lift staging, and the hours you can work. We build the install schedule around the site, not the other way around, because a crew that shows up when the loading zone is blocked, or the lift is booked by the concrete crew, just burns a day. Ask any installer who has stood outside a locked gate with a full crew: the coordination is half the job.
US Permits and Right-of-Way: The Part Everyone Underestimates
Unlike the UK, which has fairly uniform hoarding rules, the US has no single national standard. Permitting is local, and it varies by city and even by district.
The pattern to plan around: if the barrier sits entirely on private property inside a building, permits are usually about the barrier structure and life-safety, not the graphic. The moment the barrier touches the public sidewalk or right-of-way, or the graphic is visible from and adjacent to a public street, you can trigger sidewalk-shed rules, encroachment permits, or local sign-code review. Some municipalities also limit commercial advertising content on construction barriers versus project-identification content.
We do not pull permits, and no honest installer should tell you the graphic is exempt as a blanket statement. The right move is to confirm with the general contractor and the local jurisdiction early, because permit questions decide timing and sometimes what the graphic is allowed to say. The install itself is fast once the wrap and the barrier are ready. The permit conversation is what should start weeks ahead. If your barrier is a branded exterior run, treat it as both a barricaded wall graphics project and a compliance question from day one.
A Pre-Install Checklist You Can Actually Use
Before you approve print on a barricade or hoarding job, run this list. It catches most of what goes wrong.
- Confirmed whether this is an interior barricade or exterior hoarding
- Measured the real barrier, not the blueprint dimensions
- Matched the substrate to the exposure and the build duration
- Located every door, corner, and cut-out on the survey
- Planned seams away from faces, logos, and key lines
- Confirmed site access, lift staging, and working hours with the GC
- Raised the permit and right-of-way question with the GC and jurisdiction
- Set a realistic durability expectation for the chosen substrate and orientation
Where to go from here
Barricade and construction wraps reward the planning you do before print far more than the print itself. Get the survey done on the real barrier, match the substrate to the exposure, plan the seams around the artwork, and settle the permit question early, and the install becomes the easy part. If you are weighing a barricade or hoarding project and want a straight read on what your specific site needs, Graphic Installation Team surveys the barrier, coordinates with your general contractor, and installs it cleanly, as 3M-certified, women-owned installers working across DFW and nationwide.
